Why a Pinhole Leak in Pool Filter Housings Happens and When to Fix It
Finding water on the pool deck near your filter is never a good moment. If you’ve traced the drip to a pinhole leak in pool filter housing, you’re probably wondering whether a quick patch will hold or whether the whole tank needs replacing. Good news: many small leaks in plastic or fiberglass housings can be repaired with epoxy and a bit of patience. This guide walks through how these holes form, when a repair makes sense, and exactly how to seal one.
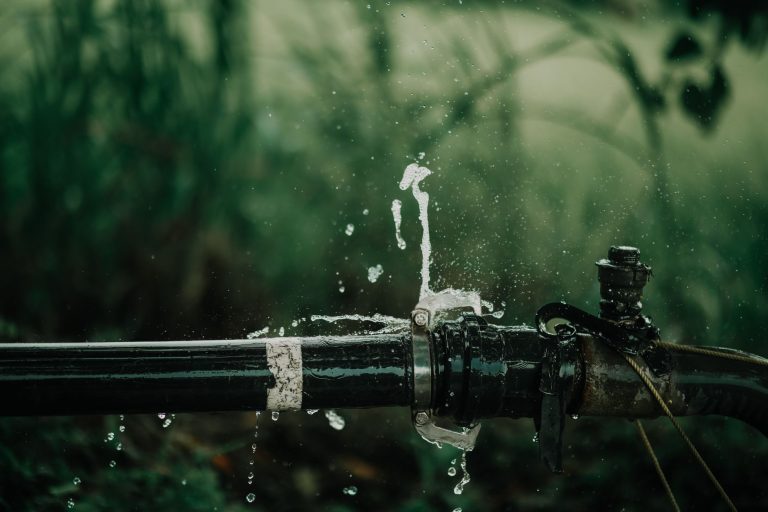
Most pinholes come from one of two sources. The first is corrosion, which usually shows up where water sits in a low spot or where dissimilar metals touch a housing mount. The second is impact, such as a dropped vacuum head, a mower strike, or a cracked spot left behind from freeze damage. Pinholes are small, often no bigger than a pencil tip, and they tend to weep rather than spray.
Repair is realistic when the hole is isolated and the surrounding material still feels solid. If the crack runs along a seam, spreads into a wide split, or sits near the threaded lid, a patch rarely lasts. In those cases replacing the housing or the whole unit is the safer call.
Sealing a Small Hole in Your Filter Housing, Step by Step
Before you start, confirm the pool pump is off and the power is locked out at the breaker. Close the isolation valves on the suction and return lines if your plumbing has them. Then open the drain plug on the filter and let the housing empty completely. A sand filter can hold a surprising amount of water in its lower chamber, so give it several minutes. You’ll also want a bucket or towel under the drain to catch the spill.
-
Drain the filter and dry it thoroughly. Remove the drain plug, open the air relief valve, and wait until no more water drips out. Wipe the outside of the tank with a clean rag and let the area air dry for at least an hour. Surface moisture is the number one reason epoxy fails to bond, so don’t rush this part. Use a hair dryer on low if the humidity is high. The follow-up piece Pool Pump Disassembly to Trace Seal and Gasket Failures covers this in more practical detail.
-
Find the leak precisely. Dry the housing and watch it for ten to fifteen minutes with the filter empty. A pinhole often shows as a faint damp ring or a tiny bead of water that forms slowly. Mark the spot with a grease pencil or a strip of painter’s tape. Look closely at the seams and the area around the drain fitting too, since leaks often hide there.
-
Clean the area around the hole. Wipe a patch about two inches wide around the leak with isopropyl alcohol on a lint-free cloth. Oils from your hands, sunscreen residue, and pool chemical film will all weaken the bond. Let the alcohol flash off completely before moving on. You should see no streaks on the surface when it dries.
-
Roughen the surface. Use 80-grit sandpaper to scuff the cleaned patch in small circles. The goal is a matte finish that gives the epoxy something to grip. Stop when the gloss is gone, then wipe away the dust with a dry cloth. Avoid digging deep into the shell, because thinning the wall can create a second leak nearby.
-
Mix and apply the epoxy putty. Choose a two-part epoxy putty labeled for plastic or fiberglass, and check the label for the working time and cure time. Knead equal parts of the two colors until the streak disappears. Press the putty firmly over the hole and feather the edges outward so there’s no sharp lip. Overlap the cleaned area by about half an inch on all sides, and build the patch slightly thicker over the hole itself.
-
Allow the epoxy to cure fully. Most putties set to the touch in 30 to 60 minutes, but the full cure usually takes 12 to 24 hours at room temperature. Cooler weather slows the chemical reaction, so an overnight wait is a good default. Don’t pressurize the filter until the patch feels hard all the way through. Check the label for your specific product, since cure times vary between brands.
-
Refill the filter and test for leaks. Close the drain plug, reconnect the lines, and open the valves again. Turn the pump on and let the system run at normal pressure while you watch the patch. A pressure gauge reading that climbs past what your filter normally sees can also reveal a weak seal. Check the spot again after a few hours and then the next morning. If it stays dry, you’ve got a solid repair.
Mistakes That Make a Filter Patch Fail Early
Most failed patches trace back to a few avoidable errors. Knowing them in advance saves you a second round of sanding and mixing.
- ❌ Wrong: Using a general-purpose super glue or silicone sealant on a plastic housing. ✅ Right: Using a two-part epoxy putty rated for plastic or fiberglass, which bonds mechanically and holds up under pressure.
- ❌ Wrong: Skipping the cleaning step because the surface “looks clean.” ✅ Right: Wiping with isopropyl alcohol so oils and chemical film come off before the epoxy goes on.
- ❌ Wrong: Applying epoxy to a damp housing. ✅ Right: Drying the shell completely, since moisture blocks adhesion.
- ❌ Wrong: Pressurizing the system before the cure time is up. ✅ Right: Waiting the full cure window printed on the product label.
Keeping the Repair Holding Over the Long Run
Once the patch cures and passes the test, the job isn’t quite finished. Check the repaired spot every day for the first few days, then once a week for the next month. Look for beading water, a damp ring, or any new discoloration. Early signs are easier to catch than a steady drip that has soaked into the mounting bracket.
Plan an annual inspection of the housing as well. Look at the seams, the drain fitting, and any spot where the tank sits on metal supports. A little attention each season is far cheaper than an emergency replacement in the middle of summer.
You May Also Like
- Persistent Issues Across DE, Sand, and Cartridge Pool Filters
- Sand Filters Compared with DE Filters on Leak and Flow Problems
- Why Diatomaceous Earth Filters Develop Cracks in the Manifold
- Saltwater Versus Sand Pump Performance Under Low Pressure Conditions
- Circulation Drops in Sand Based Filters Require Specific Checks